Sunday, November 23, 2014

#NJMQGRetreat14

I just returned home after spending 5 days and 4 nights among the company of 17 wonderful fellow quilters and artisans. We sewed, we quilted, we laughed we shared and there was even the opportunity to learn about INSTAGRAM! We were also taking pictures with our phones and cameras and the photos here in this blog post were captured by many of the retreat attendees as well as by myself.

We arrived just prior to lunchtime on Wednesday. Most everyone quickly unloaded their vehicles, chose a spot to sit and sew and a room. It was a pretty orderly process and everyone helped each other with getting their things inside the building and set up. That really set the tone for the entire stay. After a quick walk over to the log cabin for lunch, we headed back to sew our hearts out. The sewing machines started to hum almost immediately and continued throughout the week. There was a really fine vibe and buzz in the air as everyone introduced themselves to each other and checked out what items the others had brought to work on for the duration of our retreat. Some people brought one thing, some brought two or three and many brought multiple items even six or seven!


The one thing all of us had in common was quilting and sewing. There was a multitude of sharing that went on at all hours. We may have come to retreat as strangers or mere acquaintances, but we left as close friends and in awe of each others talents and abilities to complete the beautiful projects we worked on.

As we walked to dinner on Thursday evening, it was very cold, dark and it had just started to snow lightly. We sewed into the wee hours of the night and much to our surprise, woke on Friday morning to 2 inches of snow! It made our surroundings a beautiful winter wonderland. Everything was white, shiny, glistening with nature's chill.


We even ended up being visited by a tiny snowman on the deck railing outside the common room where we sew. Frosty ended up acquiring a cute little scarf to keep him warm in the freezing temps. The sun was out and eventually everything melted, but for a few hours we all felt and enjoyed the magic of winter's first snowfall.

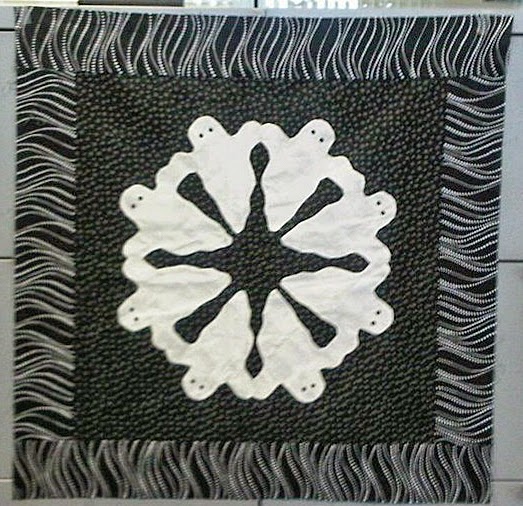
I am sure you are probably wondering what things were finished during our retreat. Here are some photos...


We were never too far from technology with the free wifi and some of us even got INSTAGRAM lessons from Ruth.


We even played a quick 10 card round of Cards Against Humanity. It was super fun because we sat in the middle of the room with the non-players around us and they were laughing right along with us. Mary Kirchoff was the lucky winner of CAH, and it was her first time playing the game.

We had brought five design walls with us and there was always something beautiful to see at any given moment on each of them. In addition to the walls, there were comfy chairs and couches, often adored with quilts and works in progress.

Okay, so we managed to take a group shot before some of the quilters left on Friday evening.


And then just for fun, the funny face picture! Pick your favorite one!


I didn't really finish anything that I brought with me. I did manage to get these hexies pieced, but had forgotten the other fabrics and pattern I needed to complete the top. LOL! I did finish a 3 dudes top which I had started in my jelly roll class last Sunday. Did not take a photo. I guess I will blog about it when I finish it. I also managed to wrap a couple of clotheslines with fabric that have since been made into baskets for the upcoming Holiday Boutique in December at rock,paper,scissors.


Thanks to everyone of my quilty friends that came to the NJMQG retreat 2014. I don't know about you, but I had a wonderful time and I can't wait to do it again. See you on Instagram and Facebook soon!


#NJquiltretreat14 #quiltingretreats #friendsquilting #modernretreat

Wednesday, November 19, 2014

Long Arm Quilting Business Lesson Learned

I have always been a believer that competition is a great thing. In business, it keeps us honest and on our toes.

I was at quilting retreat and on vacation last week and weekend. I had a wonderful time. I will blog about that in another post. However, being on vacation means that I was not at my studio, working and taking in new customers.

Due to a much appreciated referral, I received a phone call while I was gone and the nice lady left a message that I should call her back that day. It was a Friday. I received the message on Sunday evening when I returned home and I called and left a message for the quilter that I had been gone and would call her on Tuesday when I would be available to speak freely with her.

I did call her as promised on Tuesday afternoon. Unfortunately for me, she had already found another quilter to perform the custom quilting job. She apologized that she had gone to someone else and I explained that she didn't need to apologize, as I was the one that had not been available. We actually had a lovely discussion about her quilting, guild membership and other stitchy subjects. She had planned to call me last night to let me know that she was taking her quilt to Allentown, PA to be quilted. She is looking for someone closer to where she lives in Northern NJ.

I gave her my cell phone number so she could always reach me in the future. I wasn't upset over the loss of potential income, as I am quite back logged at this point in the busy season of long arm quilting. I just felt bad that I did not have the foresight to forward my business line to my mobile number while I was gone. herein lies an important lesson learned by me this month. Hopefully, this quilter will come to me the next time and I will earn her business in the future.

I am wondering if other self employed artisans have thought about this? I hope that by writing about it I can help others avoid a missed opportunity. Comments and feedback welcome!


Wednesday, October 22, 2014

Orange Pumpkin Spice Cake

Those of that follow me know I have many passions in life at the moment. One is quilting. Two is Baking and three is my beloved family, Mike, the dogs and my parents.

Mike has been invited to attnd a Night of Remembrance tonight with his sister in law and nephews to honor his late brother. Lori is doing a great job of raising those two beautiful boys as a single parent. I promised her I would bake a cake for him to bring with him to share with the group at the event tonight.

So this morning after wrapping two clothes lines with fabric for coasters, I started to bake. Today's cake will be an Orange Pumpkin Spice Cake.


The ingredients are as follows:
1 boxed Spice Cake Mix with pudding in the mix.
1/2 cup water
1/2 cup orange juice
1/3 cup oil
1 tsp pumpkin pie spice
1/2 tsp nutmeg
1/4 tsp ground cloves
1 tbsp orange extract
1/4 cup almond meal Plus 2 tsp to coat pan
1/3 cup pumpkin purée
3 whole eggs
1/2 cup raisins

Preheat the oven to 325 degrees F. Grease an 10-12 cup BUNDT pan. Sprinkle with almond meal to lightly coat the inside of the pan.

In a large mixing bowl, blend all ingredients. Mix 2 minutes on medium speed, scraping the bowl as needed. Pour into your prepared pan. Bake at 325 degrees F for 65-70 minutes or until toothpick tester comes out clean. Cool 10 minutes on rack. Invert onto serving platter; cool completely on rack. If desired, drizzle with orange glaze (recipe follows).

Orange Glaze
2 cups sifted powdered sugar
1 TBSP softened butter
2-4 TBSP orange juice
1-2 tsp grated orange zest
In medium bowl, mix sugar and butter. Gradually add OJ until desired consistency is reached. Stir in orange zest. Drizzle over completely cooled cake.


#orangepumpkinspicecake
#pumpkinspicebundtwithorangeglaze
#spicecakeorangepumpkin

Autumn Spiced Pear Bundt

Awhile back I found some big cans of pears on a deep discount, so I picked them up to use at a future date. This morning, I woke up ready to bake, and decided a nice Spiced Pear Cake was perfect for this first really cold day of Autumn. I hadn't baked in a number of days because I was out of eggs which I got during yesterday's grocery adventure.


Here are the ingredients:
1 box yellow cake mix
1 box vanilla pudding
3/4 cup egg whites
1 tsp cinnamon
1/2 tsp nutmeg
1/4 tsp ground cloves
1 cup of water
1/3 cup vegetable oil
1 can of pears (Drain and reserve the juice in a measuring cup for glaze)
1/4 cup pear juice

Chop the pears into 1/2 inch pieces. Set aside. Pre heat oven to 350 degrees F.

In your mixing bowl add all of the other ingredients and beat at medium high speed for 2 minutes scraping the sides as needed to ensure the ingredients are well blended. Fold in the pears and beat on low for 1 additional minute.

Grease and flour your Bundt pan either with baking spray or shortening and flour. Ensure all crevices, the inner tube and inside surfaces are well coated. If using flour, tap excess out.

Pour batter evenly into your prepared pan. Gently tap the pan on a dishtowel laid on your counter to release any air bubbles and to ensure the Bundt pan pattern is filled. Bake the cake at 350 degrees F for approximately 65-70 minutes. Cake is done when tester inserted into center comes out clean.

Meanwhile, while the cake is baking, add 1/4 cup reserved pear juice, 1/8 tsp nutmeg, 1/4 tsp cinnamon to 1 cup powdered sugar. Whisk together until smooth, glossy and light beige color. You may need to add more juice or powdered sugar to get the right consistency for your glaze. It should be the consistency of soft serve ice cream. Place in fridge to firm up while cake is baking.

Cool the Bundt on a rack for 15 minutes before inverting onto your serving platter. Allow to completely cool for about another 45 minutes before adding the glaze. I like to use a small spoon to drizzle the glaze over the top and sides of the cake. Cover cake once completely cooled and glazed and it will keep 4 days in the fridge, covered.

The cake stands on its own with the beautiful shiny glaze, but you can slice and serve with washed and sliced fresh pears on the side for a nice autumn treat.


#spicedpearbundt #autumnpearcake #yummypearcake #spicedbundtwithpears

Friday, October 17, 2014

Hawaiian Applique at Rock Paper Scissors in Montclair, NJ Sunday, October 26th

I will be teaching a Hawaiian Applique by Machine Class at Rock Paper Scissors in Montclair, NJ October 9th 2014. Back in August, I spent parts of a weekend making samples for the store to display and use to promote the class. I really enjoyed the process of updating the well known classic technique to something a bit more modern and faster.

Hawaiian Applique traditionally is two pieces of fabric where one is applied to the other, either using hand applique or reverse applique. In my class, we use freezer paper and glue to create the Hawaiian motif and make the piece to be applied down on the background. How my class differs is that we use the sewing machine, invisible thread and tiny electronic stitches to finish the edges.

I love Hawaiian Applique because it brings me back to my childhood. Do you remember taking a sheet of paper and folding it several times, then cutting out designs that would make snowflakes? This technique is very similar to those school kid snowflakes we all made and loved. Instead of construction paper, we use freezer paper which has a waxy coating on it that will stick to washed fabric when heated with an iron.

Here are photos of the finished samples. During the class I will show many more finished pieces that I have done using this technique.


Since its October and Halloween is just around the corner, here are some of those blocks I made using the techniques you will learn in this class. I had so much fun making these patterns by Tina Gravatt and the skull one with the Day of the Dead fabric always gets the most comments.


For those of you looking for holiday and winter inspiration, here are two additional blocks I've made of snowflakes using this technique as well.


Please come join us on October 26th. Call the store at 973-337-6759 to sign up for this class and get the supply list.

#hawaiianappliquebymachine
#halloweenappliquebymachine
#learnappliqueinaday

Wednesday, October 15, 2014

Custom Quilting 3D Windmills

I just finished up two beautiful made 3D Windmill quilts pieced by the lovely Judy Josephson of New Jersey. Judy is the lucky grandmother of newborn twin baby boys and she made these adorable quilts for the most recent additions to her growing team of grandsons.

The fun part of finishing the quilts was being able to quilt whatever I wanted in the blocks and borders. The difficult part was the quilting of the blocks because of the three dimensional element of the wind mill blades. I needed to stop, pin each 'flap' out of the way four times for each block. I wanted to share my experience with you because I learned so much along the way with these blocks.

Judy came to me with her quilts neatly pressed as well as more than large enough backing and batting. She also had her wish list of instructions for me to consider while quilting her quilt. I had never had a customer hand me a to do list of do's and don'ts. But I have to admit that that list helped with our planning discussion. It allowed us to review her expectations and desires and it gave me a much better idea of what this customer wanted. The quilt backs were pieced and also had large panels with a really fun rabbit print in the middle. Judy wanted me to consider this when I quilted them, ensuring the quilt was centered both horizontally and vertically. This is a fairly uncommon request, but it made sense looking at the backings she had lovingly created. She had even marked with painters tape where the bottom of the quilt should end up on one of them.

I started with Adam's quilt simply because A comes before B. The fabrics spoke to me, especially the grey herringbone one in the outermost border and block backgrounds. I quilted the border with a random zig zag to make it look. Like a child's drawing and the inner border was done with a swirl vine to fill it up and add consistency to the density of the quilting. The name and animal applique pieces were outline quilted first. I even gave the hippos kneecaps, eyebrows and nostrils in stitches. Judy is going to add eyes to the faces when she gets them home.

Next I decided to quilt the centers of each block Before the borders. I determined my best bet was to pin the flap of the windmill triangle away with a long glass headed quilting pin. It was necessary to have the machine throat plate under the section I was about to quilt in order to place the pin, catching just the tip of the 'wing' and to ensure the pin caught the background and the point of the pin came back up to to top so the machine wouldn't catch on the pin itself as I was moving the long arm around.

I found my trusty 6" ruler to be most useful for stitching in the ditch around the outside of each quadrant square. One I had done the stitch in the ditch, I quilted the individual square with various stitches of my own choice. These were sewn the same on each of the 4 windmill background squares, but I changed them up,for every windmill so they added variety. I used loops, fans, lines, squiggles, cross hatching varieties, coffee beans (because new parents need coffee, right?), zig zags, etc. I made sure that each of the rows shifted the patterns to the right by one windmill block, adding a nice diagonal changeover as well.

I have to admit it was slow going because there was so much stopping, pinning, starting, stopping, unpinning and more pinning going on. I took my time and I am glad that I did. The results were well worth the effort and the textural interest added to the quilt really looked nice when completed. I also realized I had completely underestimated the amount of work needed to custom quilt these two baby quilts.


I took a breather after finishing the Adam Quilt before I tackled Benjamin's. Benjamin's quilt had different background and outer border fabrics than Adam's. I started with the applique name and animals in the top border adding in the same details as the other quilt. However, I took a queue from the border fabric that looked like a little straw with beads on it and freehand quilted my own modern design in the outer border. This part went very fast as did the inner border which was random loops and squiggles. However, I screwed up and forgot to check my stitch length in the top border (used a 9 instead of an 11) and I needed to rip out the squiggles and restitch. Frustrating, however, the size 9 stitches came out quickly and easily. Another lesson learned, always check your stitch length before starting to stitch after basting the layers together when loading the quilt!

I set out to make different quilting designs in the various blocks, using some of the same design elements as the first quilt, but tried many new and modern designs that I made up as I went along. Admittedly, I added two blocks with feathers in them because I love feathers and I thought they gave those blocks movement. However, when I re read Judy's instructions as I packed up her finished quilts for pickup, I realized she had said "no feathers!". When she arrived to pick up quilts, I pointed the feathers out to her and I would have removed and re stitched another pattern if she really wanted me to, but she said they were fine and no worries. Lesson learned here is that if you are quilting multiple quilts for someone and they have given you specific instructions, re-read them in between quilts to make sure you refresh your memory with the customer requirements. A few of the windmill blades need pressing after quilting, but I left that up to her to do since I wasn't sure if she had washed her fabrics before piecing.
I also decided to leave the little tiny 1/2 inch sashings unquilted on both quilts. The cool effect this had on the back was that the rabbits looked like they had their own little quilts on them. Judy, noticed it right away and thought it was pretty cool. Since the quilts will become wall hanging for the nursery, no one will probably ever see the backs, but it was an additional little unplanned feature that is now part of those finished quilts. I thought by leaving them unquilted it added a nice dimension to the quilt front.
Judy was very pleased with her quilts, and gave me a wonderfully generous tip that made up for my original estimation for quilting services. She even took one of the quilts to the Pennington Quilt Works and wrote me a nice note this week on how much they loved my stitching.

#3Dpinwheelshowtoquilt #customquilting #quiltingflaps #quiltinglessonslearned

Thursday, October 9, 2014

Bundt pans make more than cakes

Tonight I decided to try and use my favorite bundt pan, the Bavarian, to bake dinner for us. I had seen a recipe somewhere along the line suggesting that one could bake good other than cakes in the bundt pan with good results. I am happy to report, it works!

I had a package of uncooked breakfast sausages which I set in a frying pan to cook. As they browned, I chopped up some small colored sweet peppers, a small yellow onion and tossed them with the meat to cook as well. It took about 10 minutes.

In the meantime, in a large bowl, I combined 6 fresh eggs plus 3/4 cup egg whites, 1/2 cup skim milk and some salt and pepper plus a couple of pinches of italian seasonings. I whipped these together until fluffy. I added 2 1/2 cups of frozen shredded hash browns and 1 cup of shredded cheddar cheese. Then I added the veggies and sliced up sausages. After blending the ingredients well, I cut up 1 roll of biscuit dough into 1 inch chunks and stirred them to coat them.

Then I prepped the bundt pan by spraying liberally with Pam and then sprinkled 2 Tsp of bread crumbs over the inside. Next I poured the egg, meat and veggie mixture into the prepared pan, and pressed the ingredients down to ensure there are no air pockets. I decided it might be wise to place the pan on a baking sheet, in case it bubbled over, and baked in a preheated 400 degree oven for 55 minutes.

Viola! The Egg and Sausage Bake was done. I promptly removed it from the oven and cool for 10 minutes to set, before inverting onto a platter to serve.


It turned out golden brown and was delightful. The combination of the eggs, sausage, potatoes, onion, pepper and spices plus the cheese were heavenly. It made quite a hearty meal and there was plenty leftover for my breakfast this morning.


I suggest you refrigerate leftovers which can be reheated in the microwave for 1-2 minutes to warm before consuming


#eggsinabundt #breakfastbundt #sausageeggbiscuitbake #notjustforcake

Wednesday, October 8, 2014

Jelly Roll Jumble

On November 9th, I will be teaching a class at Rock, Paper, Scissors in Montclair, NJ. The class will feature 4 different quilts you can create using one jelly roll made of 2.5" strips of fabric.

It was harder than I thought it would be to create patterns for the various quilts I wanted to teach how to make. But now they are done. And it was a great experience creating patterns and instructions for something new.
I also took the time to finish each of them into quilts (not just tops) for the class samples. Apologies for the clothespins, but it was quite windy outside when I photographed them before taking them to the shop for display.


Quilt #1 - Three Dudes Quilt


Quilt #2 - Stacked Spools


Quilt #3 - Snowball & Shoofly


And finally Quilt #4 - Modern Squares


I hope you will be able to join me for this fun and innovative class. Students will learn how to make all four quilts in a single afternoon. Who knew you could create so many different things from 20 pre-cut strips of fabric, some light and dark yardage and a little thread? The Fabrics in these quilts are all from Free Spirit/Rowan True Colors line.


#JellyRollJumble #StripPiecing #3dudes #stackedspools #snowball&shoofly #modernsquares #rowantruecolors